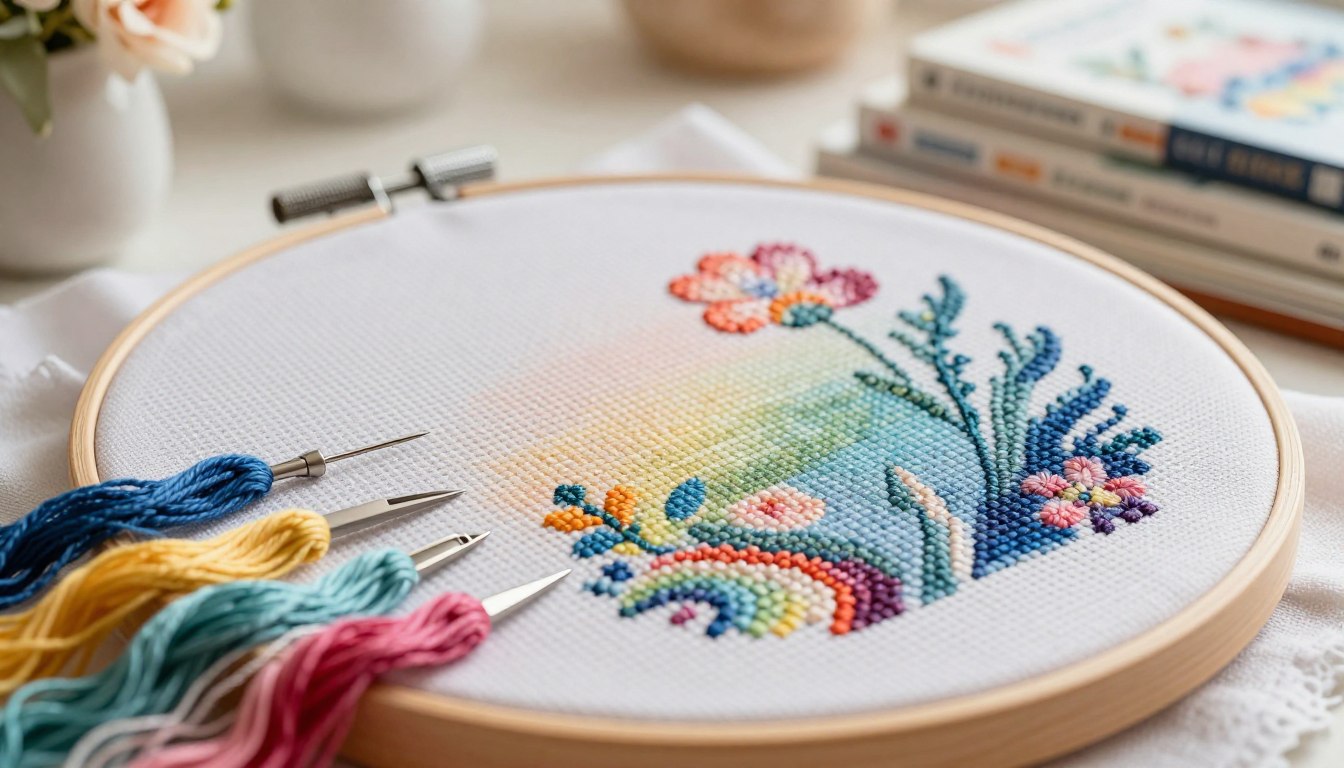
Creating beautiful cross-stitch pieces is all about the finishing touches. Mastering cross-stitch techniques is key to making your embroidery stand out.
Turn your average cross-stitch into something special by focusing on the details. With the right cross stitch tips and embroidery hacks, you can enhance your stitching.
Key Takeaways
- Mastering finishing techniques is crucial for polished cross-stitch work.
- Attention to detail can elevate average stitching to exceptional.
- Proper methods and techniques are essential for beautiful embroidery.
- Using the right cross-stitch tips can improve your stitching.
- Embroidery hacks can help you overcome common stitching challenges.
The Fundamentals of Quality CROSS STITCH
The foundation of a stunning cross-stitch lies in the selection of premium materials and essential tools. To create a piece that is both beautiful and durable, you must start with the basics.
Selecting Premium Materials
When it comes to cross-stitch, the quality of your materials is key. DMC floss is a top pick for its vibrant colors and durability.
Premium Threads vs. Budget Options
Premium threads like DMC floss offer a wider range of colors. They are also less likely to fade over time compared to budget options.
How Material Quality Affects Final Appearance
The quality of your thread directly impacts your cross-stitch’s final look. High-quality threads produce vibrant, consistent colors. These colors enhance the beauty of your work.
Essential Tools for Professional Results
Achieving professional results in cross-stitch requires the right tools. Cross stitch tools can greatly enhance your stitching experience.
Needle Selection and Maintenance
Choosing the right needle for your cross-stitch project is crucial. Tapestry needles are preferred for counted cross stitch. They have blunt tips and large eyes.
Specialty Tools Worth Investing In
Investing in specialty tools like magnifying glasses and thread conditioners can improve your stitching experience and results.
| Tool | Purpose | Benefit |
|---|---|---|
| Tapestry Needle | For stitching | Blunt tip prevents fabric damage |
| Magnifying Glass | For detailed work | Enhances visibility |
| Thread Conditioner | For thread management | Reduces tangling and breakage |
Mastering Stitch Tension and Consistency
Getting your stitches to be the same is key to making great cross-stitch. It makes your work look better and last longer. To get it right, you need to learn how to stitch evenly and use special thread laying tricks.
Developing Even Stitching Techniques
Even stitches are the heart of any top-notch cross-stitch. There are a few ways to make sure your stitches are even:
The Two-Hand Method for Consistent Tension
Using both hands to control the thread helps you keep the tension even. Hold the needle in one hand and the thread in the other. This lets you adjust the tension as you go, keeping your stitches consistent.
Maintaining Direction Consistency
Stitching in the same direction is just as crucial as keeping the tension even. Always stitch in one direction to keep your work looking uniform. You can do this by following a pattern or routine.
Advanced Thread Laying Techniques
There’s more to stitching than just the basics. Learning advanced thread laying methods can really boost your cross-stitch game.
The Railroad Method for Perfect Stitches
The railroad method helps you lay the thread in a way that prevents twists and keeps stitches flat. It’s great for big projects or when you’re using lots of colors.
Using Thread Conditioners Effectively
Thread conditioners make stitching easier by reducing friction and preventing tangles. They’re especially helpful with long threads or complex patterns.

Mastering these techniques will help you make cross-stitch pieces that look amazing and last a long time. Whether you’re just starting out or have been stitching for years, paying attention to stitch tension and consistency will take your work to the next level.
| Technique | Description | Benefit |
|---|---|---|
| Two-Hand Method | Using both hands to manage thread tension | Consistent stitch tension |
| Railroad Method | Laying thread to minimize twist | Flat, even stitches |
| Thread Conditioners | Reducing friction and preventing tangles | Easier stitching, less thread wear |
Strategic Fabric Selection and Preparation
To get professional-looking results in your cross stitch projects, picking the right fabric is key. The fabric you choose is the base of your project. It affects how you stitch and what your finished work looks like.
Choosing Appropriate Fabric Count and Type
Choosing the right fabric count and type is vital for your cross stitch project. The count shows how many threads are in one inch. A higher count fabric means more detailed and intricate designs. On the other hand, a lower count is better for simpler patterns or bigger stitches.
Matching Fabric to Project Requirements
Think about what your project needs when picking a fabric. For complex designs, a higher count fabric is best. For simpler designs or if you’re just starting, a lower count fabric works well.
Professional Gridding Methods
Gridding your fabric is a crucial step. It helps keep your stitches even and in the right place. There are different gridding methods, each with its own benefits.
Thread vs. Marker Gridding Techniques
There are two main gridding methods: using thread or a marker. Thread gridding is temporary and easy to remove. Marker gridding makes a permanent mark. Which method you choose depends on your project’s needs and your preference.
| Gridding Method | Advantages | Disadvantages |
|---|---|---|
| Thread Gridding | Temporary, removable | May be time-consuming to set up |
| Marker Gridding | Permanent mark, easy to apply | May not be suitable for all fabric types |
Fabric Preparation for Optimal Results
Before starting your cross stitch, prepare your fabric well. This means washing and pressing it to remove finishes that could mess with your stitching.
Washing and Pressing Before Starting
Washing and pressing your fabric before you start ensures it lies flat. This is important for keeping your project looking good.
“Proper fabric preparation is key to a successful cross stitch project. By washing and pressing your fabric, you can prevent potential issues down the line.”
By carefully choosing and preparing your fabric, you’re setting up for a great cross stitch experience. Whether you’re new or experienced, paying attention to these details makes a big difference in your project’s quality.
Pattern Selection and Execution
Cross-stitch fans know that the right pattern is key. It turns your embroidery into a work of art.
Evaluating Pattern Quality
Choosing a cross-stitch pattern is crucial. Look for clear instructions and a design that catches your eye.
Working From Center vs. Corner Approaches
Where you start your project matters. You can start from the center or a corner.
Strategic Starting Points for Different Projects
Starting from the center spreads the design evenly. Starting from a corner keeps the fabric’s grain. It’s all about the project and your style.
Tracking Progress Without Marking Patterns
Tracking your progress is key in cross-stitch. There are ways to do this without marking your pattern.
Digital and Physical Tracking Methods
Digital tools like apps or spreadsheets help track your work. Or, you can use a stitch counter or a row counter for a hands-on approach.
| Tracking Method | Description | Advantages |
|---|---|---|
| Digital Apps | Use mobile apps to track stitches and rows | Convenient, automatic saving |
| Spreadsheets | Create tables to log progress | Customizable, easy to update |
| Stitch Counter | Manual counter for stitches | Simple, low-tech |

Thread Management and Organization Systems
Keeping your DMC floss organized can make embroidery more enjoyable. A tidy workspace lowers stress and boosts your focus on the project’s details.
Organizing Your DMC Floss Collection
Use a dedicated storage system to keep your DMC floss in order. Options include plastic boxes, bobbin organizers, or specialized floss organizers.
Preventing Common Thread Issues
Issues like tangling and knotting can be avoided with good thread management. Using thread conditioners or keeping threads untangled can greatly help.
Techniques to Avoid Tangling and Knotting
Applying thread conditioners or a bit of fabric softener can reduce tangling. This makes your threads easier to manage.
Managing Multiple Colors Efficiently
Working with many colors? Use bobbins or small spools to keep threads organized. Labeling each bobbin with the color code from your pattern makes your work flow smoother.
| Storage Solution | Description | Benefit |
|---|---|---|
| Plastic Storage Box | A box with separate compartments for each color | Keeps colors organized and protected |
| Bobbin Organizer | A device that holds bobbins in place, keeping threads untangled | Reduces thread tangling and saves time |
| Specialized Floss Organizer | A tool designed specifically for organizing embroidery floss | Maximizes workspace efficiency and accessibility |
Advanced Techniques That Transform Projects
To take your cross-stitch projects to the next level, try out advanced techniques. These methods add depth and complexity, making your work stand out.
Masterful Backstitching Approaches
Backstitching is key to enhancing your cross-stitch. It outlines and details your designs, making them more defined and attractive.
When and How to Backstitch for Maximum Impact
Use backstitching on important parts like borders and facial features. It adds texture and focus. Choose thread colors that contrast or match to highlight your work.
Specialty Stitches and Embellishments
Specialty stitches and embellishments bring uniqueness to your cross-stitch. French knots and beading add texture and dimension.
French Knots, Beading, and Decorative Elements
French knots can mimic details like eyes. Beading adds a luxurious touch and color. Try different beads and placements for the best look.
Color Blending for Dimensional Effects
Color blending creates depth in your cross-stitch. Gradually changing colors makes your work look more realistic and detailed.
Creating Realistic Shading and Transitions
To achieve shading, pick colors that blend from light to dark. Use these colors in a gradual way across the shaded area. This ensures smooth color transitions.
- Use a variety of shades to create depth.
- Experiment with different stitching patterns to achieve unique textures.
- Pay attention to thread tension to maintain evenness.
Professional Finishing Techniques
Finishing your cross-stitch project is just as important as stitching it. It makes your project look better and last longer.
Proper Cleaning and Blocking Methods
Cleaning and blocking are key steps. They remove dirt and fix any tension from stitching.
Washing Completed Projects Safely
To wash your cross-stitch, use cold water and a mild detergent. Don’t wring or agitate the fabric to avoid damage.
Blocking for Perfect Alignment
Blocking means pinning your cross-stitch to a board. It ensures your project lies flat and looks great.
Framing and Mounting Options
Framing is a common way to show off your cross-stitch. There are many framing styles, like conservation framing, which keeps your work safe.
Conservation Framing Techniques
Conservation framing uses acid-free materials and UV-filtering glass. It’s perfect for valuable or special pieces.
| Framing Option | Description | Best For |
|---|---|---|
| Standard Frame | A traditional frame with glass or acrylic glazing. | General display purposes. |
| Conservation Frame | Acid-free materials and UV-filtering glass. | Valuable or heirloom pieces. |
| Shadow Box | A deeper frame for displaying thicker or layered items. | Projects with multiple layers or dimensions. |
Alternative Display Methods
You don’t have to frame your cross-stitch. You can turn it into pillows, ornaments, or other items. This adds a personal touch to your home.
Pillows, Ornaments, and Functional Items
Make your cross-stitch into pillows, ornaments, or other items. It’s a creative way to display your work and decorate your home.
“The art of finishing a cross-stitch project is not just about completing it, but about presenting it in a way that does justice to the craftsmanship involved.”
Using these finishing techniques can make your cross-stitch projects stand out. You can show them off with pride.
Conclusion: Your Path to Cross Stitch Excellence
Keep going on your cross stitch path. Remember, patience and practice are essential for excellence. By learning the basics, choosing top materials, and improving your stitches, you’ll make stunning pieces.
Cross stitch is more than a hobby. It’s a way to relax and show your creativity. Use the tips from this article to handle tough patterns and make your work look professional.
Whether you’re new or experienced, the path to getting better never ends. Keep practicing, and you’ll see your skills grow. This will let you tackle new projects and enjoy the calming side of CROSS STITCH.
FAQ
What is the best way to choose the right fabric count for my cross-stitch project?
How do I prevent tangling and knotting when working with multiple colors of DMC floss?
What is the best method for blocking a completed cross-stitch project?
Can I use any type of thread for backstitching, or are there specific recommendations?
How do I grid my fabric for cross-stitch, and what are the benefits of different gridding methods?
What are some creative ways to display my finished cross-stitch projects?
How do I clean and care for my cross-stitch tools and materials?
What are some tips for managing multiple colors and preventing color bleed in my cross-stitch project?
How do I choose the right needle for my cross-stitch project?
This post contains affiliate links. If you click on a link and make a purchase, I may earn a small commission — at no extra cost to you. Thank you for supporting this blog and helping me keep the patterns free! Read the full Affiliate Disclosure & Transparency.