Keeping your CROSS STITCH uniform across a large piece takes more than steady hands. This guide shows practical, step-by-step methods. Your counted cross stitch will look crisp and professional from edge to edge. Whether you move from small samplers to full charts or tackle long-term commissions, the same habits prevent uneven tension, lost counting, and stops that spoil a design.
Many stitchers start with simple projects but hit trouble on bigger works. You may find inconsistent work sessions, early mistakes, or fatigue make it hard to resume smoothly. This section sets expectations: you will learn planning and organization, tool selection, tension techniques, and advanced hacks like railroading and parking to sustain quality across cross stitch projects.
The scope covers counted cross stitch on Aida, evenweave, and linen, with practical notes on thread choices such as DMC floss, frames and hoops, needle minders, and finishing steps like washing and blocking. Adopt one new technique at a time—try railroading or a specific tension method on a small area, then scale it up to avoid overwhelm.
Throughout this article you’ll find cross stitch for beginners tips and cross stitch ideas that match real user experience and realistic workflow. Use the advice here to keep your stitches consistent, sustain momentum, and finish large projects with confidence.
Key Takeaways
- Consistent tension and method are the foundation of uniform counted cross stitch.
- Plan tools and workflow before you begin large cross stitch projects.
- Test one technique on a small area before applying it across the entire piece.
- Use reliable materials like DMC floss and proper frames to reduce variability.
- Break work into sessions and use organization strategies to maintain momentum.
Preparation and planning for large projects (cross stitch tools and organization)
Starting a big counted cross stitch project needs more than just excitement. Your fabric, tools, and how you work set the pace for success. Make sure your materials and methods match your project’s size and detail.

Choose the right fabric and count for project size
When picking fabric, think about the project’s size and detail. Many prefer 14-count Aida for its clarity and ease. For finer details, try 28-count linen or evenweave, stitching over two for a similar look to 14-count Aida.
For higher-count fabrics, use smaller tapestry needles. Size 26–28 needles are best for fine counts, while size 24 works well for 14-count. Your fabric choice affects stitch size, final size, and detail from your patterns.
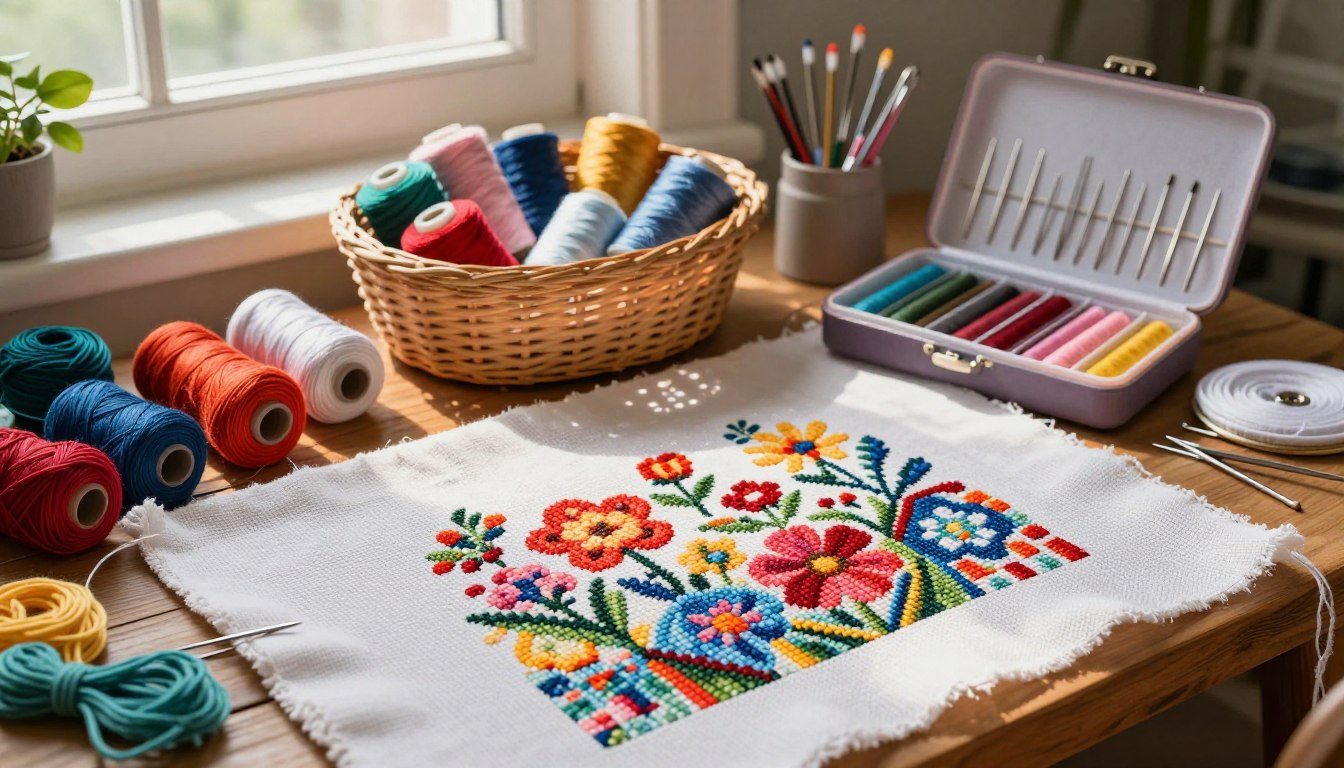
Gather essential cross stitch tools
Start with trusted thread brands like DMC floss, Anchor, or Madeira for consistent color and quality. Keep a few sizes of blunt tapestry needles handy for matching to your fabric without slowing down.
Use scroll frames or Q-snaps for big projects to show more work and keep tension even. Hand hoops are great for small areas. Don’t forget laying tools, a magnetic needle minder, strong lighting, and magnification to ease strain and speed up stitching.
Organize your thread with bobbins, labeled floss boxes, or shallow drawers. Good organization prevents tangles and makes color changes quicker, especially with complex patterns.
Plan your workflow with gridding and pattern prep
Mark grid lines on your fabric to match the chart’s 10×10 blocks. You can mark every line or just key guides. A clear grid helps avoid counting errors and keeps large areas neat during stitching.
Pre-highlight chart areas you will stitch first and mark completed squares on the pattern as you go. Choose a method that fits your rhythm: color-by-color, section-by-section in 10×10 blocks, or a hybrid approach.
Prepare thread lengths before starting. Cut from fingertip to elbow and separate strands by pulling a short section between your knees to prevent tangles. Good gridding and prep make complex projects feel doable and keep your pace steady.
Techniques to keep tension uniform (CROSS STITCH)
Keeping tension even is key for a professional finish in large CROSS STITCH pieces. Here are some practical tips to help you stay consistent from start to finish.
Establish a consistent stitch method
Choose one diagonal for your first stitch and stick with it. This rule helps your stitches look the same across the fabric.
Always enter and exit stitches the same way. Use the same hand posture and grip for consistent motion. For fractional stitches, place the full diagonal first, then add quarters or three-quarter stitches.
Thread management for steady tension
Cut thread lengths to your fingertip-to-elbow. This prevents twisting and tangles. Long threads can cause tension issues and fray during long stitching sessions.
Separate strands a few centimeters at the end and flatten them before threading. Try the knee separation trick or slide strands between fingers to avoid knots.
Pull each stitch to sit flat without puckering the fabric. Check tension often until it becomes second nature. Use railroading where possible to keep strands parallel and smooth.
Use frames and ergonomic tools to hold even tension
Use scroll frames, Q-snaps, or large wooden frames to keep fabric tight. These frames reduce distortion and help maintain steady tension.
Consider ergonomic stands, lap frames, or hands-free devices to reduce wrist strain. Comfortable tools help you stitch evenly for long periods.
Good lighting and magnification reduce eye strain. They help you avoid tightening stitches unconsciously. Combine proper lighting with a supportive frame for the best results.
| Focus Area | Practical Tip | Why It Helps |
|---|---|---|
| Stitch Direction | Choose one diagonal order and follow it | Uniform lay and consistent texture across large motifs |
| Stitch Length & Entry | Use same entry/exit points and hand grip | Reduces variation in stitch height and tension |
| Thread Length | Cut fingertip-to-elbow lengths | Limits twisting and tangling for steadier tension |
| Strand Prep | Separate and flatten strands before threading | Prevents knots and uneven pulls |
| Railroading | Keep strands parallel while stitching | Smoother coverage and fewer split strands |
| Frames & Ergonomics | Use scrolls, Q-snaps, lap frames, or stands | Maintains even fabric tension and reduces fatigue |
| Lighting & Magnification | Work with task lights and magnifiers | Prevents eye strain and accidental tightening |
Advanced stitching methods and embroidery hacks
Start with a clear plan to mix techniques without losing control. For large cross stitch projects, choose the right approach early on. This saves time and keeps your work tidy.

Railroading and laying techniques give you a professional look on tricky fabrics. Railroading separates thread strands for smoother coverage. Use a laying tool or a second needle before tightening the stitch.
This step may slow you at first but pays off with flatter stitches. It works well on dark fabric, metallics, and thin threads.
Try laying techniques for variegated floss or when coverage must look flawless in photos. Practice on a scrap square to find the right thread separation. Small tests show how railroading affects your tension and stitch texture.
Adopt the parking method for patterns with many scattered colors or confetti areas. The parking method keeps threaded needles in place for the next color. Park within nearby 10×10 sections to avoid long trailing threads on the back.
Start by parking only 2–3 threads until the routine feels natural. Use magnetic needle minders, fabric tabs, or an edge strip to keep needles tidy. Group colors to reduce re-threading where practical.
Balance thread waste against a neater backside when planning your color use. Work in 10×10 grid blocks for error control and steady progress. Combine color-by-color stitching for large solid areas with parking and section-by-section work for confetti.
Park the next threads for 1–2 adjoining blocks, finish the current block, then move forward. Within each block, apply railroading for consistent coverage and even sheen. Keep threads organized in small trays or labeled bobbins to support cross stitch organization.
This makes transfers between blocks smoother and reduces time spent untangling floss. Mix methods based on pattern complexity. Use color-by-color for broad fills where rhythm matters. Use the parking method for photorealistic cross stitch patterns with many tiny, dispersed stitches.
Switch between techniques in predictable ways so your workflow remains calm and repeatable.
| Technique | Best Use | Key Benefit |
|---|---|---|
| Railroading | Dark fabrics, metallics, thin threads | Flatter, more uniform coverage |
| Laying techniques | Variegated floss, high-shine threads | Smoother texture and clearer color transitions |
| Parking method | Confetti-heavy designs, photorealistic areas | Less re-threading and faster color changes |
| 10×10 section work | Large cross stitch projects of any complexity | Better error control and steady milestones |
| Combined approach | Mixed patterns with large fills and scattered stitches | Optimized efficiency and consistent finish |
Common mistakes, troubleshooting, and stamina strategies
Big projects highlight small errors. Catching cross stitch mistakes early saves time and keeps your work neat. Check your stitches every 20–30 minutes to spot tension or counting mistakes before they get worse.
Identify and fix tension and counting errors
Stitches tighten when you focus and loosen when you relax. Take breaks to check your stitches and adjust as needed. If your stitches look uneven, try washing them in cool water with mild detergent. Roll them in a towel and pin to shape while drying.
Counting errors often come from missing grid lines or unmarked patterns. Mark your completed areas with a pencil or highlighter. Use a ruler or highlighter tape and follow pre-marked fabric grids to avoid mistakes.
If you find a counting error, unpick back to a known point. Then, re-count from a marked grid intersection. Use a magnifier for dense areas to avoid making the same mistake again.
Thread and material-specific pitfalls
Different threads need different care. Metallic and glow-in-the-dark threads fray and break easily. Cut them shorter, use railroad stitching when possible, and choose needles made for metallics.
Silk thread splits and snags; handle it carefully and use shorter lengths. Variegated threads can pool or create patchy coverage in small areas. Plan color shifts and combine with strategic color planning to avoid unwanted pooling.
Maintaining momentum on large projects
Break your design into 10×10 grids and set small goals. Completing one grid per session helps you make steady progress and keeps you motivated. Alternate between calm, repetitive blocks and detailed areas to keep your interest and reduce fatigue.
Organize your threads and tools before each session. Pre-cut lengths, label bobbins, and have needles ready to cut setup time. Make a regular stitching schedule to build stamina and treat sessions as therapy.
If you lose interest, try a short companion project or stitch a small reward square. Use backstitching techniques on a quick motif to feel a sense of accomplishment while you recharge for the main piece.
Conclusion
To get consistent stitches on big cross stitch projects, mix careful planning with steady practice. First, pick the right fabric and thread count. Then, get the best supplies like DMC floss and a good tapestry needle. Use gridding and frames to avoid mistakes.
Start with one stitch at a time until it feels easy. Add thread management and ergonomic tools to your routine. Once you’re steady, learn new techniques like railroading and parking. This way, you’ll grow your skills without losing your pace.
Keep your project on track by solving problems often. Check the tension, use grid lines, and wash and block your work. This helps both beginners and experienced stitchers stay focused and excited about their projects.
These tips work together—test them on small parts, mix them up, and enjoy the process. As you get better, your cross stitch will look sharper, with even tension and professional finish. It will also be a source of inspiration for your embroidery.
FAQ
What fabric and count should I choose for a large counted cross stitch project?
Which tools are essential for keeping stitches uniform across long projects?
How should I plan my workflow to avoid getting lost on large patterns?
What is the best stitch method to ensure uniform stitch appearance?
How do I manage thread to maintain even tension and avoid tangles?
Which frames and ergonomic tools help keep tension steady across large areas?
What is railroading and how does it improve stitch uniformity?
How does the parking method work and when should I use it?
How can I combine section and color strategies effectively?
What are common tension and counting mistakes, and how do I fix them?
Are there thread-specific pitfalls I should watch for?
How do I maintain momentum and avoid burnout on a large cross stitch?
When should I add advanced techniques like railroading and parking?
Can washing and blocking fix uneven tension across a finished piece?
What needle sizes should I keep for different fabrics and counts?
How do I store and organize floss for large projects to avoid delays and mistakes?
How many strands should I stitch with and how does that affect uniformity?
Can cross stitch techniques improve the appearance of thread types like variegated or metallics?
What simple daily habits help keep a large project consistent over months or years?
This post contains affiliate links. If you click on a link and make a purchase, I may earn a small commission — at no extra cost to you. Thank you for supporting this blog and helping me keep the patterns free! Read the full Affiliate Disclosure & Transparency.